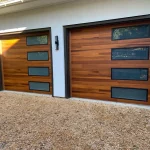
Garage door
experts are naturally the most qualified when it comes to handling projects
regarding your overhead door. In regards to installation or repair, you’ll always
want to call on a professional. Programming your garage door opener, however, is something that most homeowners can typically handle, should
they choose to do it themselves. Garage door opener manufacturers, such as
LiftMaster, make the programming process simple and easy to comprehend.
Manuals can be
a tough read, though, which is why we wanted to help you to program your doors with
the help of some simplified instruction. Continue reading in order to find out
how you can program your garage door opener and remote to meet your needs!
Before you get
to any actual programming, you’ll need to ensure that the light bulb in the
opener is working and functional. The opener’s light is often used as a
programming indicator, so this will need to be operating in order to verify
that everything is working.
- The first step to programming your garage door opener is pushing the
“Smart” or “Learn” button on the opener. The color of the button will vary
based on the year and model of garage door opener you have, so you may be
looking for green, red-orange, purple, or yellow. Once this button is
activated, you should see an LED light turn on. - Next, you’ll want to grab your remote and look for a program button.
Again, the make or model will vary when it comes to the location of this
button. On some, it’s found behind the visor clip – which can also be used to
press the hard-to-reach button. On others, you will need to look for holes on
the side of your device, using a pin or paper clip to press the button. A light
will turn on somewhere on the remote to indicate that it’s ready to be
programmed. - We’d like to say that there’s no rush for the next step, but that wouldn’t
be entirely accurate. When the program button has been activated, you have
about 30 seconds to sync up the remote. Turn back to your opener and hit the
same “Smart” or “Learn” button from Step 1 until you see the light turn on
again. Then, push on the button on the remote that you would like to control
the door. Pressing the button once should make the opener’s light blink to
indicate a successful pairing.Note: If the indicator light doesn’t go off, select the button on the
remote again. Once the light does come on again, do not click the button more
times. - To complete the programming process, hit any other button on the remote.
You should see the remote’s light turn off.
And there you
have it! Your garage door should be able to open and close at your command. If
you experienced any difficulty with the steps listed above, or if you have questions,
please feel free to contact the experienced technicians at A1 Door Company. We’re here to
help!
It's Easy To Book Online!
We Proudly Serve all of these Areas
Richmond, VA
Richmond, VA
Fredericksburg, VA
11901 Bowman Dr. #106
Fredericksburg, VA 22408
(540) 388-0060
Mechanicsville, VA
9400 Charter Crossing, Suite A
Mechanicsville, VA 23116
(804) 781-4008
Powhatan, VA
2405 Anderson Hwy, Suite H
Powhatan, VA 23139
(804) 603-1004
Sandston, VA
Chesapeake, VA
809 Professional Pl W Building A Unit 103H
Chesapeake, VA 23220
(757) 241-6007


 Tap to Book!